How to Diagnose and Fix a Valve Cover Leak
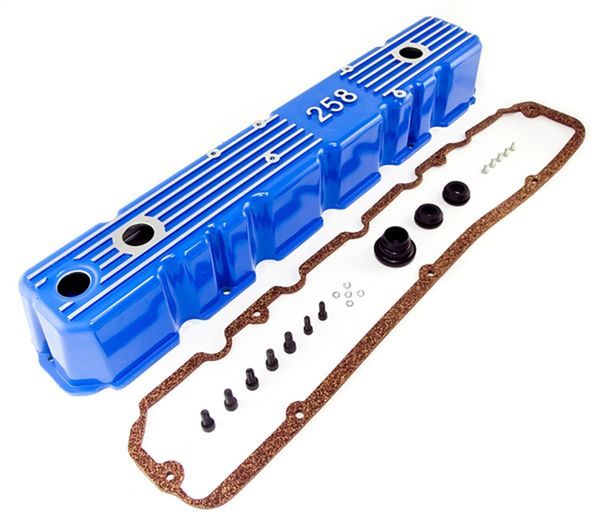
New Valve Cover Gaskets, Gasket Sealants, and Mechanics Tools
If your engine is burning oil there are surefire signs to look for. Do you smell oil burning? Is there smoke when you start your car or truck or when the engine heats up? Check your oil and see if it’s low. If it is and you have experienced any of these other symptoms, there’s a good chance you have an oil leak. Some oil leaks can be difficult to diagnose so that’s why we wrote this blog, How to Diagnose and Fix a Valve Cover Leak. With a simple visual inspection of the top of the engine, you just find that your oil leak is right in front of your eyes.
Your Valve Cover, Gasket, and Valves
Your intake and exhaust valves open and close rapidly and each motion has a specific job to do. Because of this constant motion, the entire time the vehicle is running everything under the valve cover is under tremendous pressure. These actions require lubrication and create a continuous splashing of oil on the valves to keep them from seizing under high heat and friction. Between the engine and the valve cover sits the valve cover gasket. This keeps the oil pressure consistent and seals the oil inside the valve cover. Over time and general wear and tear, gaskets break down, corrode, and become brittle. Valve cover bolts can also work themselves loose and valve covers can warp under high heat. If any of these things happen, your oil leak through the opening and down on the hot engine parts, causing smoke and burning oil smells.
Locating the Oil Leak
Valve cover leaks are pretty easy to spot most of the time. If you notice oil spots under your vehicle, the location of the spot is often an indication of what is actually leaking. But not always… If you spot oil under your car or truck near the rear of the engine, the first thoughts are the oil pan or rear main seal but if the valve cover is dripping from behind, it could be your valve cover gasket. Look for signs under the hood before you jump to more expensive fixes. A leaky valve cover gasket will almost always be covered in oil. Carefully inspect the valve with the engine running and look for leaks. A valve cover will not leak while the car isn’t running.
Keep Track of Your Oil Levels
If you haven’t found your leak immediately so you can get it fixed, make sure you watch your engine oil levels. Check it every time before you start your car. A car without oil will cause expensive damage to your engine.
Steps to Fix A Valve Cover Oil Leak
Step 1:
Try tightening down the valve cover bolts before you take everything apart. There is a possibility that the bolts worked loose from the extreme heat and engine vibrations. If the gasket is bad this will not fix the gasket issue. Also, valve covers are made of a few different materials. Aluminum valve covers can crack and steel covers can warp.
Step 2:
Always make sure the engine is cool before you get started. A hot engine is a hazard and may result in minor to serious injuries. Make sure you remove everything that’s in the way; spark plug wires and brackets, turbocharger if applicable. Consult your owner’s manual to make sure you are following the manufacturer's instructions. Loosen the valve cover bolts and set them aside in a safe place.
Step 3:
Now you can lift the valve cover off. If the valve cover seems to be stuck you can tap it gently with a rubber or wooden mallet. GENTLY is the key term. Tap it at different angles and in different places to loosen it up. Please make sure not to drop anything in the engine when you lift the cover off. Dropping a bolt or something into the engine will make this a much more expensive project.
Step 4:
Once the valve cover is off, we can remove the valve cover gasket. Often a failed gasket will be brittle and will not come off in one piece. You can scrape it off but make sure to use a plastic scraper. A metal scraper or screwdriver can score the engine head and cause future leaks.
Step 5:
You may use a silicone sealer to reinforce the gasket seal but ONLY if your owner’s manual says to. Some vehicles recommend it and some do not. Now place the new valve cover gasket around the ledge of the cylinder head where the valve cover will go. Make sure to line up the holes for the bolts.
Step 6:
Now place the valve cover on the gasket and line up the bolts. When sealing anything it’s helpful to tighten the bolts in a pattern. Turn every other bolt a little and keep going in the same direction until every bolt is tightened equally. Using a torque wrench and following the owner manual’s instructions on “just how tight” will help you take the guesswork out of the project.
Congrats! You Just Fixed Your Leaky Valve Cover
When you need work on your car, whether it’s to fix a leaky valve cover or take care of that loud exhaust before your neighbors call the cops, Auto Parts 4 Less is your one-stop shop. We are a multi-vendor marketplace that specializes in affordable car parts from the top brands and most reliable sellers online. Find everything you need to fix your car or truck with Auto Parts 4 Less.